Step-by-step tutorial
Embroidering a Personalised Wedding Veil: A Step-by-Step Tutorial
Published 13 July 2026 · 8 min read · LittleEva.in Workshop, Kannur, Kerala
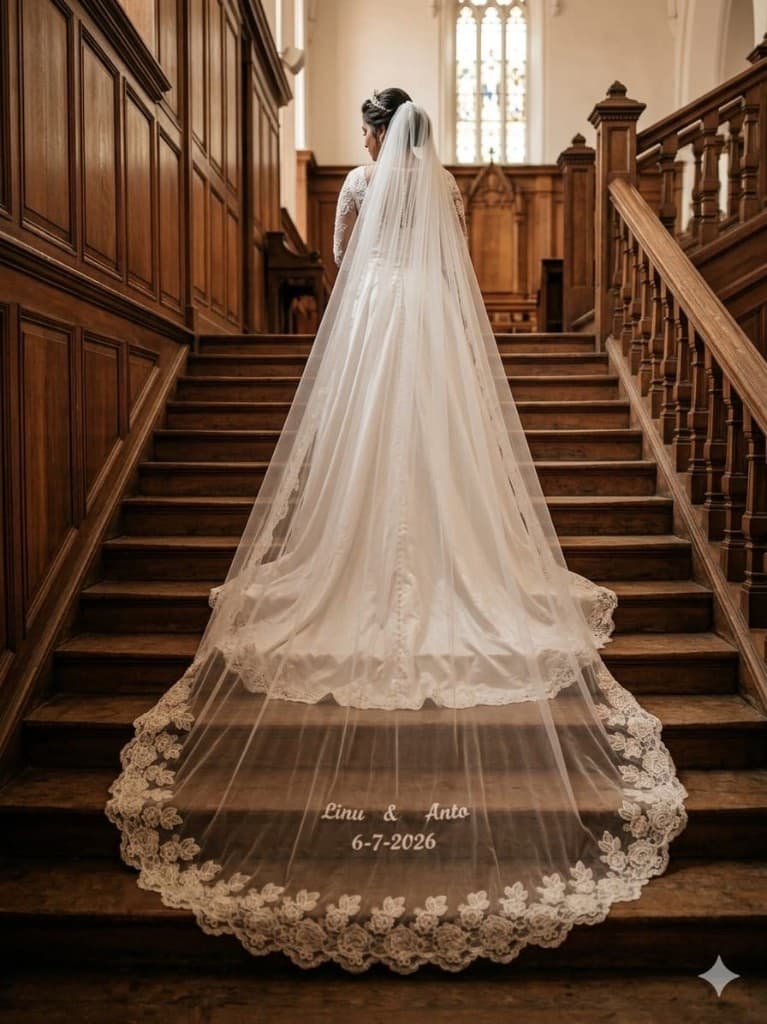
Of everything we make, wedding veils carry the most weight — not in grams, but in meaning. This cathedral-length veil was made for a couple marrying in July 2026, with a floral lace border sweeping around the train and their names and wedding date embroidered into the tulle, where they trail behind the bride down the aisle.
A veil looks like the simplest garment imaginable: one piece of net. But tulle forgives nothing — every stitch shows, nothing can be pressed out, and there is no lining to hide behind. Here is how this veil was made, photographed at each stage in our workshop.
Watch the veil come together
A short video from our workshop showing this exact veil being made — from laying the lace to the finished embroidery.
What goes into this veil
- Soft ivory bridal tulle, wide enough to cut the full train in one piece
- Floral guipure lace appliqué for the border, matched to the tulle shade
- Embroidery thread for the names and wedding date
- A metal comb for fixing the veil into the hair
- Fine hand-sewing needles, invisible thread, chalk, and sharp shears
1Plan the veil with the couple
Every veil starts with a conversation. Length is the first decision — this bride chose a cathedral veil, long enough to spill down the church steps behind the gown. Then the lace: how dense, how far up the sides it should climb, and whether it should frame the face or stay behind the shoulders.
The personalisation came last and mattered most: the couple's names and their wedding date, embroidered just above the train where the veil lies flat and every guest walking behind the bride can read it.
2Choose the tulle and lace
Bridal tulle comes in more varieties than you would expect, and the wrong one ruins a veil before the first stitch. We use a soft, fine net that drapes with the gown instead of standing away from it, in an ivory that photographs warm rather than stark white.
The lace is a floral guipure — a firm, sculptural lace whose rose motifs hold their shape when stitched to something as weightless as tulle. Matching its tone to the tulle is done in daylight, because lace that matches under workshop lights can turn yellow in the sun.
3Cut and shape the train
The tulle is cut in a single uninterrupted piece — a cathedral veil with a seam is not an option. The bottom edge is rounded into a smooth oval train along a chalked curve, cut freehand with long, continuous strokes of the shears. Tulle does not fray, so the cut edge itself becomes the hem, which means the cut has to be perfect the first time.
4Lay and stitch the lace border
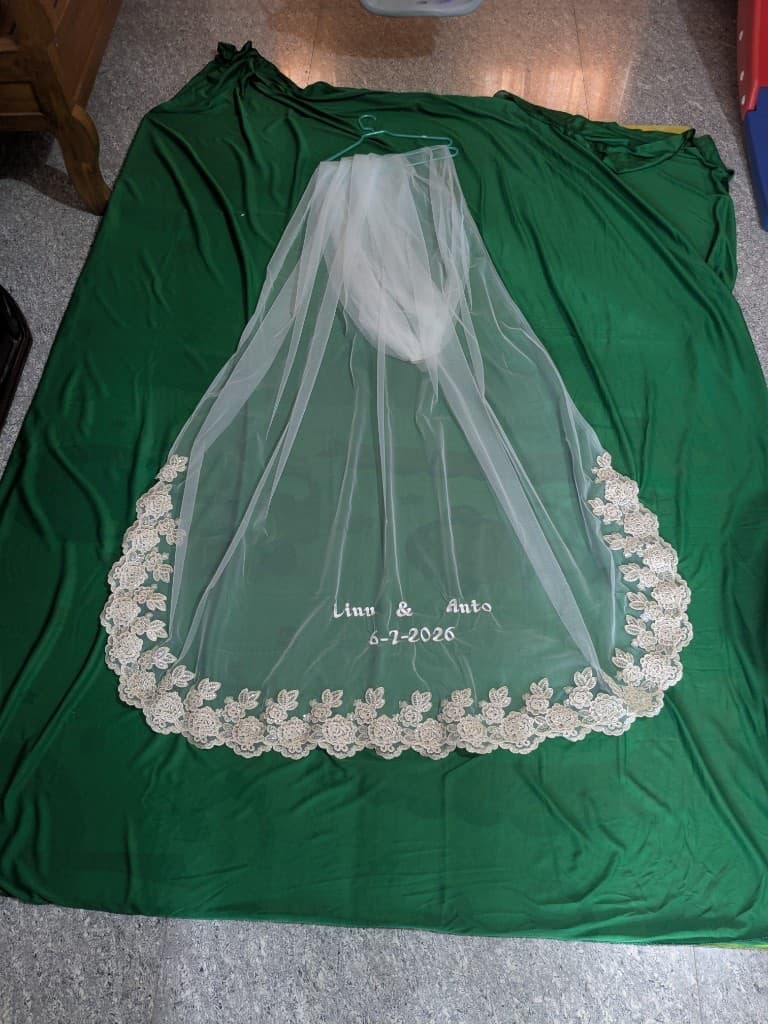
This is the slowest stage of the whole veil. The guipure motifs are laid one by one along the curved hem — densest around the train, tapering as the border climbs the sides. Each motif is pinned, then judged from across the room, because a border that looks even up close can read lopsided from where the guests sit.
Once the layout is right, every motif is stitched to the tulle by hand with invisible thread, catching the net in tiny stitches that disappear into the lace. There are no shortcuts here — a machine-stitched border on fine tulle puckers, and puckered tulle can never be pressed flat again.
5Embroider the names and date
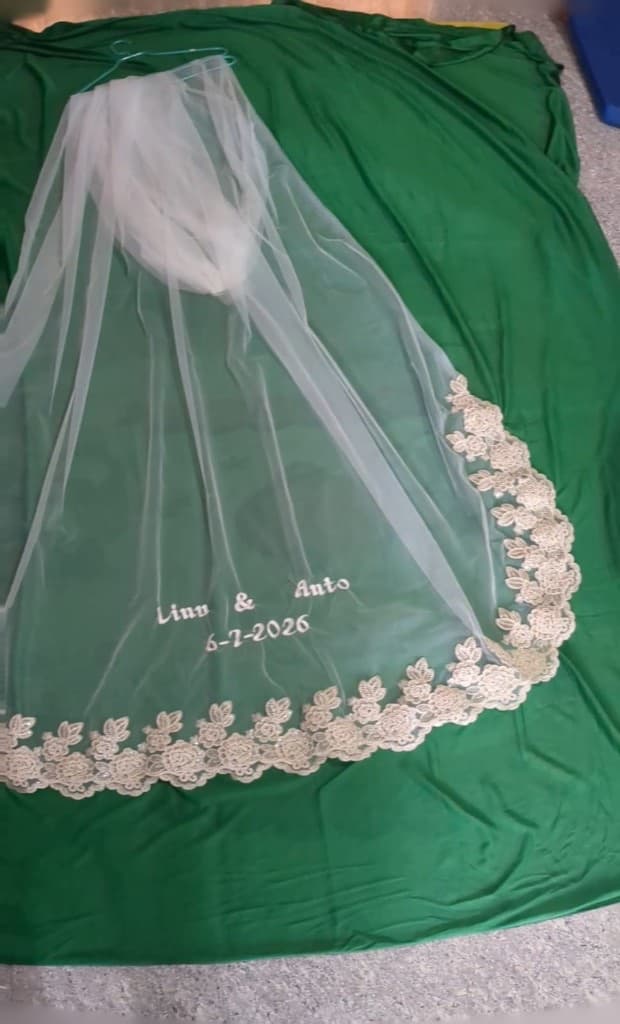
Embroidering on tulle is the trickiest embroidery we do. The net is stabilised in a hoop with a wash-away backing so the stitches have something to form on; without it, the lettering would pull the holes of the net together and pucker the train.
The names and wedding date are stitched in a script sized to be read at a few steps' distance, in a soft shade that stays quiet against the tulle until the veil lies over the gown or the church floor — and then it appears, exactly where it was planned in step one.
6Gather the crown and attach the comb
The top edge of the veil is gathered into a small, soft fall of tulle and stitched onto a metal comb, wrapped so no hard edge ever touches the hair. The gathering controls how the veil breaks over the shoulders — too tight and it sticks out, too loose and it slides flat. We fit it on a dress form and adjust until the cascade falls naturally.
7Press, check, and pack
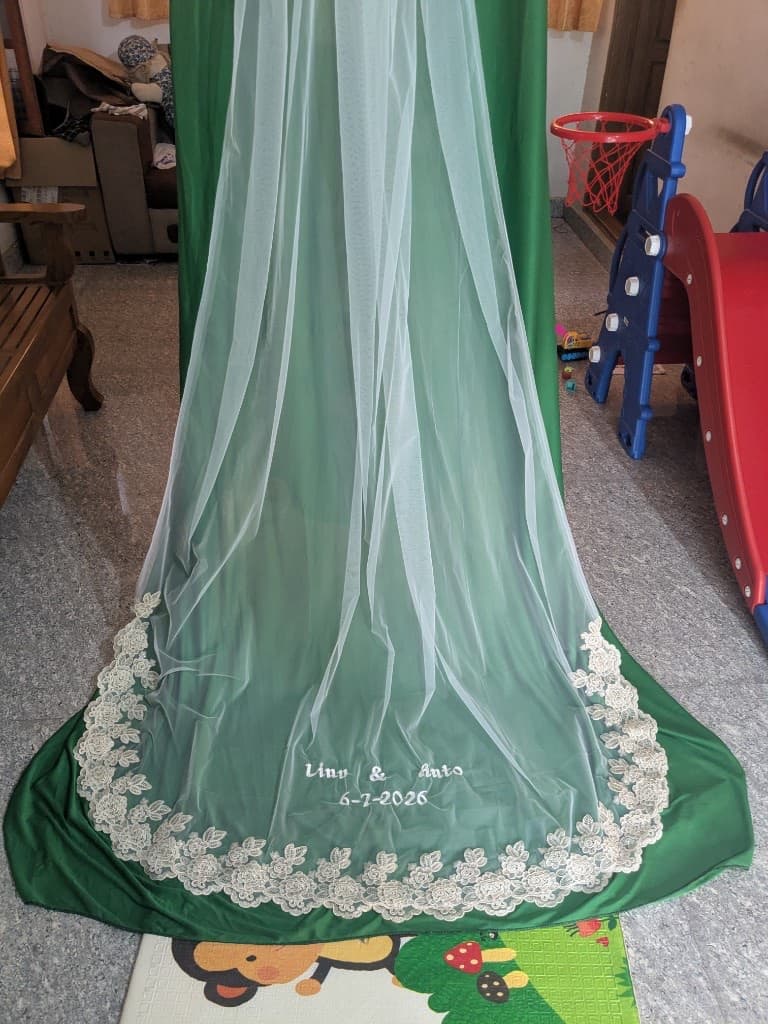
The finished veil is steamed — never ironed directly — and then checked against the light, where any loose thread, missed stitch, or misaligned motif shows instantly. Finally it is packed rolled around tissue rather than folded, so it reaches the bride without a single crease to steam out on the wedding morning.
8The result
On the day, the veil did exactly what it was made to do: the lace border traced the train down the church steps, and the couple's names and date lay perfectly flat and readable at the end of it. A veil is worn for a few hours and kept for a lifetime — which is why every stitch in it is made to last that long.
Planning your own veil?
We make veils in every length — chapel, cathedral, or fingertip — with your choice of lace and your names, date, or a verse embroidered into the tulle. Each one is made to order in our Kerala workshop.
More from the workshop: Making a Velvet Diaper Bag · Making a Striped Tote Bag